Monday, December 19, 2011

In3d project part 2

Here comes the next part of the modelling, which are the wheels.

First i made a cylinder pipe,then bevelled it.
Then i duplicated another 3 more.

After some aligning and adjustments, the main wheels is done. 

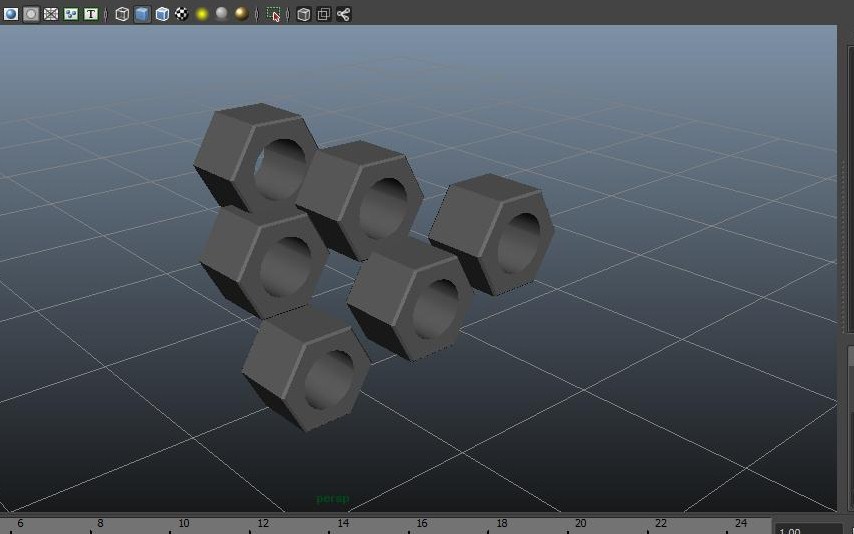
Next comes the screws and nuts, i've made a cylinder with 
just 6 divisions to create a hexagon block.
Then i boolean>difference it with a cylinder in the middle for the screw.

I then duplicated it 5 times for the whole skateboard.

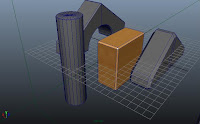
Now comes the truck, i used [create polygon tool] 
to draw the outline of a part for the truck.
Then i used [extrude] tool to extend the plane. 

And i added a block for the top, and after some adjustments....

Next comes the hanger part, and i created it using the 
same tool as the one i used to create the previous piece.
Then i created another block as the neck of the hanger.
After some adjustments....

Now to add in the connectors for the screws
i created a cylinder pipe, tilt it abit so that it connects with the hanger
then i used another cylinder, boolean it to get the space for the nut.

Now i add in the axles... 
Add in the nuts..
And Done!!

Saturday, December 17, 2011

IN3D Project 1

I'll split this critique into 3 parts,the Board,Truck&Wheels and lastly the Texturing.

To start modelling the Board,I'll need to create the basic shape the board consist of 2 semi circle and 1 rectangle.
I first create a polygon cylinder 
Cut it out using Boolean>Difference to create the semi cylinder 

 And my Semi Cylinder is done.

 Next I'll duplicate it and rotate the duplicated one 180 degrees so as to make the opposite end of the board.
 Next i create a polygon block in the middle to be the main.
 Now comes the bending of the two semi cylinders(front and back)
However,i found out that the bend does not bend exactly in the middle
so i'll have to lengthen the subdivisions to give space for the semi cylinders to be able to bent.
  

 After that i used Union to combine them together so that i can bend it together with the block.
Next i go to Face section to select the faces that i want to bend.
When comes to the bending part, i used rotation however the rotating point is not 
pivoted correctly,so i press [insert] to change the pivot position. 
 After bending the left side,i continue to the right side.
 Now comes the bevelling part
I bevelled the whole board of 0.5 width
But for the two semi cylinders, they seems to be much more smoother
So i bevel it again on the edges itself
 And the Board is done.


Wednesday, November 30, 2011

Story
This is the story of a skateboard that's being abandoned by it's owner. One day a mouse called Bobby sneaked into his room and went running around.Bobby then met another mouse in the room called Rico,then both of them challenge to a race.While running Bobby tripped and flew right onto the skateboard and skated all around the room and flew out of the window when it got hit onto something hard.
Shape
Board-i'll be using the extrude tool to create the bend on the front and back of the board.
wheel-Using the boolean tool to create the hole for the screw.
Truck-Using extruding and boolean tools to create.
Design
I'll be using these picture for reference
Different views
Research
I found this tutorial on the grip texture of the skateboard that i think will be usefull

I also found this tutorial on how to assemble the skate truck and i think it would help me greatly

Sunday, November 27, 2011

Week5
This is my first time trying out texturings 3D objects,at first i thought adding colours was already enough but when i was introduced to this, i got addicted to it and i kept on trying out new things.

For the wall practice,i was puzzled when i was adjusting the material about why it isn't what i expected,but when i rendered the wall, it turns out great.So i then realise what we see in the view is not the actual thing itself, and can even adjust the lightings and other stuffs to make it look better.
The texture used for the blocks are kinda special and new to me, not used to it when it was still in perspective view,but i still turn out great after rendering.

For the track,i used the ramp texture which i find it simpler and interesting to use,it's basically
like a gradient tool to blend the colours.

The cardboard is the one that makes me really worried when i tried doing it, because the texture in the perspective view is totally different from what i chose,but then i rendered it in the end,it all makes sense.

For the bucket i learnt an faster way to apply diff colours of the same texture,simply by duplicating the material and changing the colours.


Rendered pictures